Whitey turns red build thread! | Page 2 | Ford Explorer Forums - Serious Explorations

  • Register Today It's free!

Whitey turns red build thread!

Well, I figured this would be a good single source to document my next project. I've just finished a 10 month race truck build and finally got it out of my garage and parked on the side yard so I can start my exploder next!

So here's the info to make this whole project make a bit of sense...

I picked up this explorer, it's considered a '91.

100_0407.jpg


The catch with it though is it's a mutt... It's actually 4 expos pieced together to build something that runs. List of things wrong with it, no cruise control, no heater, no a/c, turn signals don't work, power windows sorta kinda sometimes work, power locks sorta kinda sometimes work, missing a lot of the smog stuff and won't pass smog here in Nevada, doesn't run right, engine/trans/t-case all leak oil, T-case motor doesn't work, and I'm sure there's some more. I bought it mostly for the parts on it.

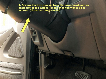
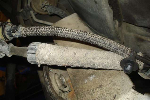
What it does have... Cut and turned with 4.5" per side widened beams with uniball pivots, extended radius arms on heim joint pivots, plated and braced beam hangers, real beadlock wheels, full fiberglass front and rear, national leaf springs in the rear with some nice custom shackles, rear axle is a newer 8.8 with discs and 4.56 gears.

For conversation purposes, we'll call him "whitey"... Whitey is an auto trans and pushbutton (non working) T-case with manual hubs.

Now let me introduce you to "Red". Red is also a '91, only he's not been molested and abused and raped and pillaged of parts by multiple previous owners. Red is a 5 speed manual and manual transfercase from the factory! (I prefer manual and it took me over 5 months to find this...) EVERYTHING works on Red and works really really good! I have receipts from the previous owner of a ford crate motor installed by ford dealer with less then 20K on it. I also have receipts for a rebuilt 5 speed trans from the ford dealer with less the 15K on it. Red runs great!!! Only issues are inside, he's missing a center console, the headliner looks like it got in a fight with a lion and the dash is cracking.

Nice thing though, whitey's interior is in great shape and is the same color so it's just a matter of swapping out the parts!

Meet red...

3Ld3M33N25N75J75M9ccfe41e7926fb461e73_zps3f75ef4f.jpg


3E73Jf3N25K15H45Mbccf314eef2d0d4a10ec_zpsf4ff24d2.jpg


So the plan is to take all the fun suspension parts off of whitey and use them to build Red. Along the way I'm adding a few more custom touches and upgrades as well. Is this going to be some long drawn out never finished project? Heck no!!!! I have about 95% of the parts on hand for the entire build and I'm hoping for the entire build to take about 2 months total to finish EVERYTHING wanted with the only exceptions being a c-clip eliminator kit for the 8.8 and a front winch. I'm not saying those won't be done in the next 2 months but they aren't a priority and I'm kinda just waiting for a deal I can't pass up type situation before pulling the trigger on one or both.

So, here's the parts I currently have in my possession slated to get put on Red.

  • 12" king coilovers for front
  • cut and turned D35 beams, widened 4.5" per side, uniball pivots
  • Extended radius arms with heimed pivots
  • front 3rd memeber with 4.56 gears and powertrax no slip
  • custom machined axles for new wider track width, not cut and sleeved but new custom machined axles
  • 2" stroke hydro bumps for the front end to help for the occasional hard hit.
  • National spring leafs for the rear
  • custom shackles
  • 12" stroke king 3 tube bypass shocks
  • fiberwerx rear panels
  • newer ford 8.8 with discs, 4.56 gears
  • Detriot locker new in the box ready to install in the 8.8

Whitey has the 95+ conversion clip on it. While I like it, it's not what I want, so that whole clip is getting sold. Red will keep the classic front square body lines but I have a set of mcneil 6" fiberglass fenders currently on order. I should see them this week or next supposedly.

Also I'll be upgrading the steering and building a single side swing set steering for red to keep the bumpsteer hopefully somewhat minimal.

Now what am I building? Well, with the list of parts above you can tell it should be a fairly capable ride. My intent is to keep the interior 100% stock. No cage, no cutting, no craziness. Inside is going to get a mild stereo system and cleaned up. Because I'm not going to be tubbing the rear wheel wells tire size will be limited to what I can fit in them. I will be either on 33" or 35" tires mounted on champion beadlocks (different then the KMC beads that are currently on whitey).

My intent when finished is to have a clean fairly different somewhat head turning type daily driver ford explorer. I want a nice all purpose vehicle. Something I can cruise comfortably around town, hold a decent pace in the dirt, pull it into 4lo and go show my jeep friends what's up. It's not being built to haul butt or race around in. I actually own another vehicle that's MUCH more suited for that kind of stuff and actually is purpose built for that. I also am partners in an offroad race truck which this explorer will see chase duties for so why would I go out and jump this thing and beat it thru whoops when I own and have access to better tools for that job. It will be setup to handle the occasional hard hit though as you can tell.

So there's my novel!!! Following posts from here out will be mostly picture oriented to document the build and answer any questions people may have or what not so lets get started...

Khris


Join the Elite Explorers for $20 each year.
Elite Explorer members see no advertisements, no banner ads, no double underlined links,.
Add an avatar, upload photo attachments, and more!
.


Okay, like mentioned above... If I was truly building a high speed rig my rear shock mounts would be drastically different. The thing is, I owned the same vehicle with a fairly similar setup about 10 years ago and amazingly it did pretty good. I had some very agressive shock valving in them though. These will be the same and in theory should actually work better then my old one since these shocks are bigger and the bypass action should help out quite a bit too. Down the road maybe next winter I might get crazy and change it up but for now these will be fine. The whole setup is bolt in so it's easily removed for any future changes if I go that route. One thing is for sure, the shocks will stay mounted under the cab no matter what I do down the road. Having the cab 100% stock inside is a priority on this build. So with that said... Some pictures...

I'll clean this up some a bit later when I get going on body work but in the end it will be covered by fiberglass anyways.

100_1485_zpsb8cbddc8.jpg


Folded under the fender and welded up. I still have a few minor spots to finish up on these as well.

100_1483_zps260ddedf.jpg


Drooped out. The mounts actually have a top plate going between the tabs and then actually a backbone/shark fin type of gusset and are fully welded 360 obviously. They're just tacked for cycling in these pictures...

100_1488_zpsb5f5cc22.jpg


Compressed

100_1486_zps364e1538.jpg


Proof that is should move up and down... Or at least down! LOL

http://s67.photobucket.com/user/sirhk100/media/Expo/100_1487_zps3f49a954.mp4.html

Assembled and on the ground.

100_1494_zps7bc3d5ba.jpg


100_1495_zps3ce263d0.jpg


Ride height on the rear.

100_1493_zps4eb2b0b2.jpg


100_1491_zps5979bfb1.jpg


Still have a bit more to go on the rear. I want to add a 3rd mounting bolt on each side of the upper shock crossmember. Need to plumb up the brake line and bleed them. Bolt up the driveshaft. Setup a breather line for the rear axle and get some wiring stuff dealt with also in the rear. I need to mount the reservoirs as well obviously.

Off the top of my head though, I think that's all I really need. I'm hoping to knock all that out fairly quick and then move on to mounting the rear fiberglass. If things go well this weekend with all of that maybe I can get really crazy and turn it around so I can start on the front end before the weekend is over. I'm not sure how long it's going to take to do the fiberglass though.


Join the Elite Explorers for $20 each year.
Elite Explorer members see no advertisements, no banner ads, no double underlined links,.
Add an avatar, upload photo attachments, and more!
.


Well over the weekend I got the rear reservoirs mounted, brake line, vent and wiring all installed and dealt with. I did notice one of the shackle pivot bushings needs replaced so I'll knock that out relatively soon. Biggest update is rear fiberglass... I've never mounted a set of these before and well... It's not a completely pain in the ass but it's not exactly easy either. I just took these two pictures in the dark walking out the door this morning to hold you over. Tonight when I finish mounting the driver side door I'll take step by step of what I'm doing to mount these. Once I kind of figured out a routine of sort it's not too bad but there's a lot of steps to make sure it's all going right. I could get a little less patient and probably skip some of them but the extra couple steps helps keep any rework from a mount in the wrong spot minimal. Actually at this point I've only had to cut off 2 mounts that were tacked in place and move them. If it wasn't for the extra steps I'm tossing in, I'm sure it would be more. So anyways, my plans are to 100% finish the glass install tonight and I'll post a somewhat decent tutorial of sort on how I'm installing the glass at least.


BTW, yes, the dzus fittings aren't straight here. They will be tonight once I pull all the panels back off to install rivets in them all.

100_1498_zps43af7d8d.jpg


100_1499_zpsee04bacc.jpg


How about a quicky non-professional how to hang rear fenders post? I'm hanging fenders that already had the dzus fittings in them but if starting fresh, you could use this method too. Only difference is your first step would be to layout where you wanted to mount them on the fenders themselves and drill the holes to mount them. Don't rivet them in yet though.

I'm showing driver side door here if it's not obvious. I held the panel up to the door to line them up where I wanted them. I then made a couple marks for the first location. Basically I marked a vertical line to hold the location front to back where my dzus needed to be and then a horizontal along the top edge of the fender. I know my fender thickness so i just need the top surface of the dzus to be that thickness under my horizontal line.

100_1500_zps328256b9.jpg


(in the picture above, you can see how much I cut out below the door handle. The door handle needs removed. To do this, lift the handle up and drill out the rivets and pop them out. Then cut roughly what you see there. I made the cut as shown obviously but then once all said and done I had to go back and cut up to roughly where the yellow lines are drawn. I simply mounted the door handles into the new panels and bent the rod to work in it's new direction. It's pretty straight forward though honestly.)

Next I bent up a dzus hanger plate. I held it on the fender and marked a line along the edge. I then moved the bend line about 0.100" over to compensate for the material thickness and bend radius basically. Then I tacked it onto the body and checked fitment.

100_1501_zpsbda5a26d.jpg


Happy with the location I left the door panel attached to it and used a jackstand to support the rest of the panel in air. I then held it up to the door where I want it and do two things. First I took a sharpie and physically used the whole as a guide to draw a circle to locate where I want the center of the dzus to be. Second, I measured the depth from the fender face to the door panel. This tells me how long my plate needs to be. I subtract the fender thickness from this measurement.

sorry some pictures are really bad but you probably get the idea hopefully!

100_1502_zpsb0e4d7a7.jpg


I then transfer that measurement over to my dzus hanger plate and bend it based on that distance.

100_1503_zpsc2986c85.jpg


I then hold my dzus up to the door and eyeball it centered on the sharpie mark I made. I can use it as a guide to mark roughly how much paint I need to grind off.

100_1504_zpse25222a3.jpg


100_1505_zps987a68df.jpg


I tack that one in place and while the fender is off I go back and finish weld the first tab since I'm happy with it's location now.


100_1506_zps3da5d8bc.jpg


When I weld I keep a wet sponge near and as soon as I'm done I use the sponge to cool it all down so that I don't melt the window rubber trim close by.

I then put the panel up to the door and check the newly tacked location. Assuming I'm happy with it I mark the next location, check the depth needed and continue on. The couple times I wasn't happy I could look at what I needed to do or what direction it needed moved. Cut the tacks, relocate it and go again.

100_1507_zpsbddf1013.jpg


When you put the panel on for that last time to try and actually hook up the door handle fish the rod into that hole you cut in the door and then dzus it all on. You'll need to attach the rod from access inside so pull the door panel off and basically hook the rod up to where it used to attach previously.


I didn't take every picture of every detail... This isn't an easy job but then again it's not hard. Just takes some thinking and layout planning. What makes it not easy really is the amount of on and off of the panels to continuously check the fitment. There's maybe an easier way too for all I know, this was my first time and just is what I figured out how to do on my own on the fly. Hopefully if you dive into the same project the steps in between will just kinda make sense.


So with the post above. I'm pretty much done with the rear end. Well, mostly... I need to add two more dzus tabs but I ran out so need to pick them up. The fenders are all mounted and finished but I need one more on each side to help the body lines line up just a bit better. I'm 100% happy with the pass side, the driver side ehhhh, it's not a show car at least! LOL I got the brakes bled last night and actually pulled it out of the garage sitting very stink bug. While out of the garage it gave me a chance to do a quick clean up and reset of the garage. I took it for a drive around the block and well, no surprises or odd noises or anything. Everything worked well. It was my first drive with the detroit and if I didn't know it was back there I wouldn't have known. It didn't drive any different or make a peep. I know it's in there though cause with it off the ground when you spin a tire they either both spin or one doesn't and it clicks while spinning it. You can't hear that clicking in the cab though cause it's so quiet. Can't wait to see how it does in the rocks though with the rear locker! I already feel this was a good choice since it's my daily driver. Not having the bangs and pops I've had from other cheaper lockers will be nice!

Anyways, I backed it in the garage and jacked the front end up to support on stands. Pulled the front tires and kinda started a mental game plan. I've got some errands to run after work today but hopefully tonight I can start getting the front end stripped off it.


I stopped by and checked out the rig last Saturday and it looks great. The plans for it will make a great rig in the end and gave me a few more ideas for my rig as well. Was great to meet up and talk about the rigs. Always good to meet forum members.

I told you the Detroit was dead quiet. Been very happy with mine.

Can't wait to meet up and go wheeling! Good times to come. :D


Took a shot looking down the pass side yesterday afternoon in the light to get an idea of the finished glass. Well, I do still need to add 2 more dzus tabs sometime to clean up the body lines and hold them right. Will knock that out sometime when I'm bored or something.

100_1510_zpsc4e82ffa.jpg


It's been A LONG time since I worked on a TTB front end. For the most part it was just as I remembered and came apart relatively quick and easy. Took about an hour or so to get the whole thing dropped out and on the ground.

100_1511_zps88ad6c67.jpg


I do need to do some reading though. Maybe I'm loosing it but I swear there was a relatively easy way to pull the axles out without pulling the entire suspension system. And do the knuckles have to come apart to actually slide the axles out of the beams? I used to know this stuff but it's just been too long. (edit: Looks like unbolting the hub from the knuckle will be the easiest for removing the axles. Feel free to correct me if there's an easier way still.)

100_1512_zps964c4cff.jpg


Goals for tonight are to get the 3rd member off the beam, axles out of the beams, radius arms unbolted and coil buckets removed from the frame rails. If that all works out tonight then I think tomorrow night I'll try and get the front end torn off whitey.

If all of that works out I should be looking really good for weekend progress! Would like to have the front ends swapped and installed by the end of the weekend so I can get going on the engine cage next. Crap that reminds me!!!! I need to get some tube ordered like today now that I think about it!


I've got my big stands holding up red right now so all I had left was my medium stands. It's solid as can be but looks a little sketchy! I'm going to check here at work today to see if maybe we have some larger stands laying around I can use for a week or so.

The beams are actually physically sitting on the ground right now. Too much travel can be a pain! LOL

100_1514_zpse8b486bf.jpg


Got the axles out of the old beams and the 3rd member pulled out too. Loaded up both of my 3rd members in my truck so I can drop them at my local driveline shop today to have them pull the locker out of one and slap it in the other.

I also got the coil buckets pulled off the frame rails. I used my oxy/acy torch to just burn the heads off really quick and then simply grabbed the bucket with a large pair of channel locks and it came right off problem free.

100_1517_zps65eb2296.jpg


Tonight I'll take a couple minutes to grind down the rest of the rivets and punch them thru.

Just for some references... This should be about ride height but the front track width will be wider. I was just curious as to how well 35's fit in the wheel well.

100_1515_zps979bf3d1.jpg


100_1516_zps030573db.jpg


...I know it's been a week but I just got back to civilization...:confused:

..It was great to meet up with you and see Red and the Race truck along with sharing some EF stories..:biggthump

..I wanted to add that Red is possibly tied for the oldest first gen explorer that I know of with a born on date of 5/90...This would put you tied with Marshall (offroad69me) and I believe that is the first month of production on the first gens...:scratch:


P.S....The dog looks like he's still waiting for you to throw the log...:D


P.S....The dog looks like he's still waiting for you to throw the log...:D

That's pretty much all he does!!! 24/7!!! LOL


Successful trip? Problem free?

If things go really well I might have whitey back on it's wheels with all stock stuff under it tomorrow night and then I can use the weekend to start tearing into Red and getting the new front end under it. I kinda have gotten ahead of myself work wise and don't have the tubing I need to possibly stay busy the whole weekend on the front end so if I end up at a stopping point on the front end due to lack of materials rather then wasting perfectly good work time I may switch over to the interior and start working on getting the headliner swapped over, center console, stereo system and look into how much of a pain swapping dashes would be.


Looking good, Kris! This is going to be a pretty sweet DD.


..I wanted to add that Red is possibly tied for the oldest first gen explorer that I know of with a born on date of 5/90...This would put you tied with Marshall (offroad69me) and I believe that is the first month of production on the first gens...:scratch:
I don't remember the born on date, but Paul B's is an early build too. I know he has to be the longest single owner of a 1st gen (bought it new). I think he even ordered it.


Got home a bit later then expected from work today but still managed to pull the entire front end off of whitey and the Drvr side beam hanger cause I want to swap it over to Red. It's been plated and beefed up so I might as well use it. I also got the stock beams and james duff radius arms that were under red originally swapped over and hung under whitey. Basically tomorrow night I've gotta slap the hubs on, bolt the tires up and drop it off the jack stands and it'll be sitting on the front bumpstops with no coils or shocks but that's fine cause it just has to be mobile enough to roll on a flatbed or trailer eventually for disposal.

So that's tomorrow night's goal. Get whitey back on 4 tires and then I can start hanging beams, modifying radius arms for red and get the front end under it this weekend and if some tubing I need shows up tomorrow maybe even get going on the engine cage this weekend. I did notice while under whitey that i'll have to drill out some holes and do a little bit of custom work on some stuff before I can mount the beams and arms under red but no biggie and it's for the better anyways... Will have a couple not very exciting shots in the morning of whitey bare up front and then the sad stocker stuff under it waiting for hubs.


Whitey's naked!!!!

100_1519_zpse77e45ac.jpg


100_1520_zps41ba3c49.jpg


But not for long... Stock beams and james duff arms slapped in place. Wouldn't want to drive it around the block the way they're installed but it'll be good enough to roll it onto a flat bed down the road or even get it moved over to my sideyard maybe tonight if things go decent...

100_1523_zps309d3055.jpg


100_1524_zpsba8890c4.jpg


100_1525_zpsc988e7c1.jpg


The heims on the radius arms I'm using on Red were TRASHED!!!! Luckily the ones in the james duff arms are the exact same heims and were still newish and very tight. So I swapped those out and good to go. I'm also swapping hubs too sorta... I want to keep the hub setup that was on red cause they've always had axles inside them. I figure the internals probably stayed a bit cleaner and better. Granted, the wheel bearings on whitey have less then 5000 miles on them but wheel bearings are cheap honestly and I just feel like the hubs on red are likely in overall better condition so since I'm swapping beams, I also have to swap hubs. Will do that tonight and get it set back on the ground.

This weekend's progress kinda depends on if tubing shows up today. If it does, I'm going to be ambitious and say I'll have Red on it's feet by end of the weekend with engine cage in place and all. If it doesn't, I'll get the whole front end hung and ready to cycle for the new engine cage when I get tubing and then when finished with that I'll move onto interior stuff and buttoning up the final two dzus tabs on the rear fenders.

Either way, this weekend should hopefully be pretty productive.


Oh I also had these axles machined up for me a few months back. They're still brand new and hopefully they're going to work okay!!! LOL Will find out soon enough. I dropped off the 3rd members yesterday to have some parts swapped back and forth in those and as soon as I get them back I'll install the 3rd and get the axles together and slid in.

100_1518_zps5880396a.jpg


It sure is sad to see whitey all torn apart. But yeah, it sounds like whitey had quite a few problems. Dang mutt!!!

Glad to see another great project thread with good pictures! Keep up the good work!

-Priz


From the previous owners I've had contact with it's had a good but interesting life. It's just time for it to be put down though. It will live on in memory thru it's parts being put to good use on their new home. LOL If what I have planned now for body/paint works out red will pay some tribute to whitey!!!

Okay, that's a little far... In all reality, I'm planning for the top half of the new rig to be white cause every little bit helps during the summer here in Vegas! LOL


wouldn't want to drive it around the block but it should be able to roll up on a trailer for it's last adventure in life when the time comes!!! Just need to finish stripping it down of the parts I want to keep still. I'm actually hoping maybe I can cheat a little. My parents come into town Monday to visit and I might see if my Dad is bored enough to do some wrenching on it and strip it down for me while I'm working on red...

100_1537_zps2d057907.jpg


100_1536_zpsd7151f5f.jpg


100_1538_zps4f1472df.jpg


I'll buy that grill, turn signal housing, and offroad lights!! If you wanna part it out :D That white explorer looks so sexy. Even if its in misery!


This thread's so much better than the one on DR! :) Glad I stumbled across it.


Join the Elite Explorers for $20 each year.
Elite Explorer members see no advertisements, no banner ads, no double underlined links,.
Add an avatar, upload photo attachments, and more!
.


I'm holding off to sell the whole front clip as one complete kit. It is for sale though.


LOL Mounty! You're the first one from DR that I know of that's found this one. There's probably about 10 people total over there that know what I'm up to. I don't like how no matter what you do or how you build your own vehicle, people over there will tell you it's wrong and won't work. So they have the build thread they have... LOL


Back
Top