LD50 Full-size axle thread `93 Ex | Page 14 | Ford Explorer Forums - Serious Explorations

  • Register Today It's free!

LD50 Full-size axle thread `93 Ex

LD50 Full-size axle thread `93 Ex SAS

Hey fellow Explorer enthusiasts!

Well I never thought I`d do it, but it`s time.
I originally thought I would go to a smaller rig one day but I`m going to beef up the Explorer instead. Since I already have a huge thread on my previous work I decided to start fresh.

If you would like to see my previous mods, you can navigate from my signature link, or click here:
http://www.explorerforum.com/forums/showthread.php?p=523171#post523171

~

My plans are to install a D44 and 9-inch into the station wagon and run 35 inch tires. Hopefully she`ll still get in the garage, but if it don`t then oh well. During this I also have some body work to do.

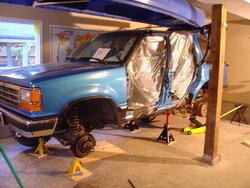
Right now I have the rear end out, I took off the spare tire hanger and removed the muffler and rear most heat shield. (doors are off for body work)Next the gas tank comes out so I can prep the underside for rust protection, from the t-case back. In the meantime I am trying to sell some parts for cash.

First big decision is what gear ratio. The 4.10`s on 33s was nice, but I think I`d like a bit more torque than that so I`m thinking 4.88 or 5.13s.
 

Attachments

  • prep.JPG
    prep.JPG
    62.9 KB · Views: 10,434


Join the Elite Explorers for $20 each year.
Elite Explorer members see no advertisements, no banner ads, no double underlined links,.
Add an avatar, upload photo attachments, and more!
.


Looking good as always. Keep up the good work. I enjoy the updates.


Join the Elite Explorers for $20 each year.
Elite Explorer members see no advertisements, no banner ads, no double underlined links,.
Add an avatar, upload photo attachments, and more!
.


In regards to the 5.13's you'll really like the low end that you get from them, it's very nice. I can't decide whether or not I want to switch to 4.88's. 5.13's with 35's is too low for highway speeds for me, but you may have a different OD ratio. I run about 3,000 rpm @70mph in 5th gear. I'd like to be around 2,300-2,500.


It`s not a commuter and I`m relatively close to many good wheeling areas, anyway, no turning back now.

And it begins..

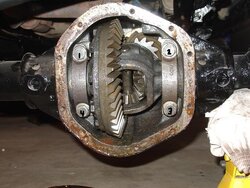
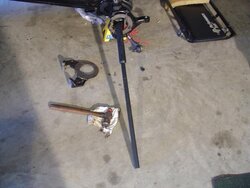
First I have to get the old carrier out of the axle. The D44 axleshafts will slide right out of the housing (after prior dissassembly to allow this), they are not c-clipped like the 8.8 and TTB D35.
The most important thing here is to mark the main caps for re-assembly. They are removed by undoing the 4 bolts on either side of the carrier. The main caps are machined from the factory as one unit while they are bolted in place, you cannot interchange them, they must go back on in the same orientaion that you took them off.
I used an electric etcher to number the bolts and kept the bolts in the main caps.

(picture enhanced through the magic of Microsoft paint)

.
 

Attachments

  • D44 gear and locker install 2.JPG
    D44 gear and locker install 2.JPG
    72.6 KB · Views: 664


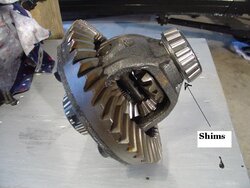
On the D44 axle, the shims are located under the bearings. When you press the bearings off, keep these shims AND remember what side they were on ESPECIALLY if you are re-using your original carrier. With the locker going in I don`t see a likely chance of getting lucky with the shims, but I will use them for my first set-up attempt, as I would if I was keeping my original carrier.

.
 

Attachments

  • D44 gear and locker install 3.JPG
    D44 gear and locker install 3.JPG
    53.4 KB · Views: 662


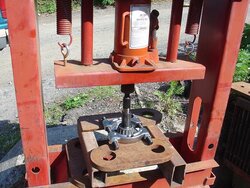
I`m going to get the bearings off the carrier tomorrow on a friend`s press.

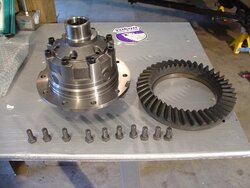
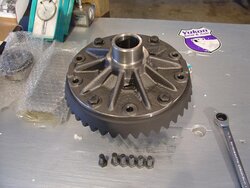
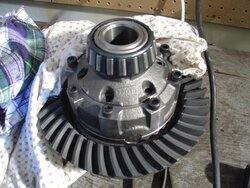
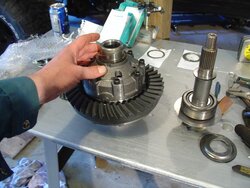
In the meantime I put the ring gear on the locker.
The kit came with new ring gear bolts and blue removable threadlocker.

-I Lined it up and seated it with four bolts, hand wrench tight. I marked the bolts to remember them..
 

Attachments

  • D44 gear and locker install 4.JPG
    D44 gear and locker install 4.JPG
    54.1 KB · Views: 669
  • D44 gear and locker install 5.JPG
    D44 gear and locker install 5.JPG
    55 KB · Views: 651


Then I installed the rest with threadlocker to handwrench tight and took the four back out and reinstalled them with threadlocker.

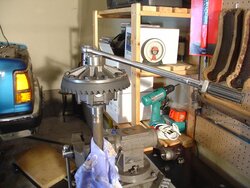
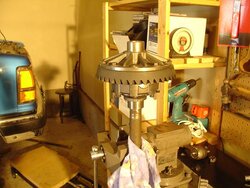
After they were all hand wrench tight, I put one of my shafts in my vice and sat the locker on it.
I then used a torque wrench to torque them all to the ring gear manufacturer`s specifications, which were included with the gearset.

-55 ftlbs

I started slowly, tightening evenly and moving around the ring. eventually I hit 55ftlbs on all of them.
 

Attachments

  • D44 gear and locker install 7.JPG
    D44 gear and locker install 7.JPG
    63.9 KB · Views: 645
  • D44 gear and locker install 6.JPG
    D44 gear and locker install 6.JPG
    60.4 KB · Views: 643


Fantastic work ld50 - clean as usual :thumbsup:


mine would have dirt and graese all over them..


inner oil seal removal

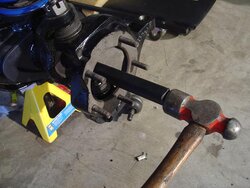
Got lucky with a cheater bar we use at work for load binders.
1 5/8" round tube on the end of 1 inch square tube. Need at least 35 inches long to pound out both seals into the pumpkin. The 1 5/8 tube slides in perfectly, then hit with hammer.
 

Attachments

  • D44 gear and locker install 8.JPG
    D44 gear and locker install 8.JPG
    43.4 KB · Views: 651
  • D44 gear and locker install 9.JPG
    D44 gear and locker install 9.JPG
    53 KB · Views: 645


I pressed off the bearings from the original carrier, keeping track of the shims and where they went. Sorry no pics of that.

The old carrier and ring gear is of no use to me, I just needed the bearings and shims.

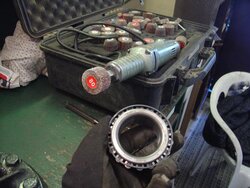
The bearings I converted to set-up bearings by using a die grinder to hone out the inside until they just fit onto the locker carrier.
I did this so that as I set it up I don`t have to press the new bearings on and off as I find the right shim combination.
After they were ready I pushed them on with the original shim combination uder each bearing.
 

Attachments

  • D44 gear and locker install 10.JPG
    D44 gear and locker install 10.JPG
    56.2 KB · Views: 647
  • D44 gear and locker install 11.JPG
    D44 gear and locker install 11.JPG
    65.5 KB · Views: 631


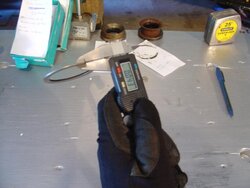
I have a digital caliper to measure my shims as I progress through the setup.
unfortunately the kit doesn`t come with any real thin shims, so to make small changes you have to measure and find the right shims and do the math.
 

Attachments

  • D44 gear and locker install 12.JPG
    D44 gear and locker install 12.JPG
    39.2 KB · Views: 634


Next I had to get my pinion gear out.
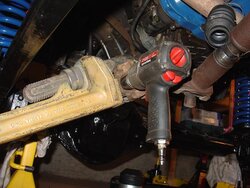
I used a big pipe wrench to hold the yoke while using an impact gun to loosen the nut.

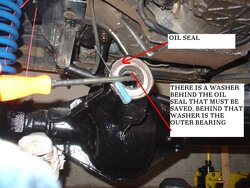
Then the oil seal has to come out, see pic for method. Just hit the screwdriver with a hammer, and she will come out. The install kit has a new seal so no worries about saving it. Save the washer under the oil seal for re-use.
 

Attachments

  • D44 gear and locker install 13.JPG
    D44 gear and locker install 13.JPG
    60.6 KB · Views: 625
  • D44 gear and locker install 14.JPG
    D44 gear and locker install 14.JPG
    72 KB · Views: 631


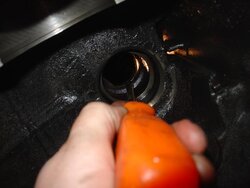
You have to drive the pinion bearing races out with a punch. This is one of those times I couldn`t find the fricken thing until after I took the picture with my screwdriver -honest!
Anyway, hit them evenly so they come out without binding.
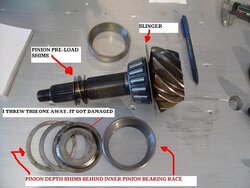
Behind the inner bearing race there was a set of shims, your pinion depth is adjusted with them.
 

Attachments

  • D44 gear and locker install 15.JPG
    D44 gear and locker install 15.JPG
    35.3 KB · Views: 632


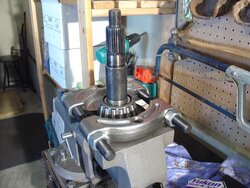
This is the stock pinion gear.
When you take it out you will notice there is a set of shims on the spline side. These adjust your pinion bearing pre-load, which I will adress later.
 

Attachments

  • D44 gear and locker install 16.JPG
    D44 gear and locker install 16.JPG
    55.5 KB · Views: 619


Turned out I needed that slinger, there was one in the kit but it didn`t fit. So I went back to my friend`s press and pressed the bearing off.

Here you can see the tool I`ve been using to press all bearings off..
 

Attachments

  • D44 gear and locker install 18.JPG
    D44 gear and locker install 18.JPG
    86.3 KB · Views: 632
  • D44 gear and locker install 17.JPG
    D44 gear and locker install 17.JPG
    62.5 KB · Views: 628


Here I have the old slinger under the new bearing which I have pressed onto the pinion gear.
FIRST, I tried to put the carrier in the assembly to see how it fit. Turned out I had to get rid of a small shim from each side to reach my setup goal for the carrier. I only measured to find two identical shims to remove, doesn`t matter what they were, as long as it was even. You will need a rubber mallet to pound it in.
That goal is to get it seated with a certain amount of pre-load, then spin it by hand and let go, if it spins one revolution on it`s own, it is ready for setup.
 

Attachments

  • D44 gear and locker install 19.JPG
    D44 gear and locker install 19.JPG
    56.8 KB · Views: 638
  • D44 gear and locker install 20.JPG
    D44 gear and locker install 20.JPG
    63.9 KB · Views: 624


After you are happy with the carrier, pop it back out and install the pinion gear without preload shims or pinion oil seal. Just put the washer back on that was between the yoke and outer bearing, put the yoke and washer on and tighten down the bolt until you get resistance when turning the pinion.
Then install the carrier again and tighten the bearing caps down. I did it to the final torque just to be sure -60ftlbs.

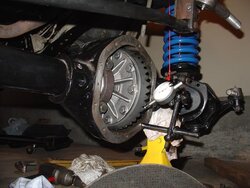
The magnetic base for the dial indicator just didn`t have the strength I wanted, by an amazing stroke of luck I could thread it into one of my bolt holes.
First setup backlash measurement -zero.
 

Attachments

  • D44 gear and locker install 21.JPG
    D44 gear and locker install 21.JPG
    56.4 KB · Views: 623


Making some good progress. I wish i could have lockers. They would help so much.


Join the Elite Explorers for $20 each year.
Elite Explorer members see no advertisements, no banner ads, no double underlined links,.
Add an avatar, upload photo attachments, and more!
.


HA, just have access to all the tools and lots of reference material. Still a little ascairt of blowing it.
Burns lockers are awesome, can`t wheel without them now, at least need the rear locked minimum!

Busy day, not alot to show for pics, since the scenery doesn`t change much.
I found my biggest thing here was getting the pinion at the right depth, I had the pinion gear and race in and out 3 times before I nailed it.

When I last posted I had zero backlash so I adjusted my carrier shims to compensate. To simplify my notes I separate my carrier at the ring gear, on side is short one side is long from the ring gear.
reduce backlash - move shims fromlong side to short side
increase backlash move shims from short side to long side
Moving the pinion changes where the gears make contact in the tooth, and when you change th epinion depth it throws out your backlash.

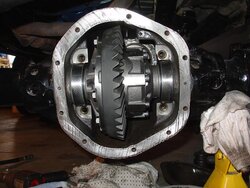
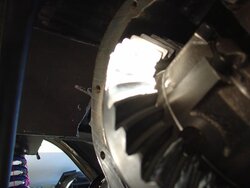
There is gear marking paste with the install kit, you brush it on your ring gear and spin th epinion while holding the carrier tight, it then shows how the contact is.

I tried to get a picture of the gear paste in action but it just doesn`t come through in pics.
This was my first attempt which told me my pinion needed to go deeper..
 

Attachments

  • D44 gear and locker install 23.JPG
    D44 gear and locker install 23.JPG
    31.8 KB · Views: 602


Back
Top