LD50 Full-size axle thread `93 Ex | Page 5 | Ford Explorer Forums - Serious Explorations

  • Register Today It's free!

LD50 Full-size axle thread `93 Ex

LD50 Full-size axle thread `93 Ex SAS

Hey fellow Explorer enthusiasts!

Well I never thought I`d do it, but it`s time.
I originally thought I would go to a smaller rig one day but I`m going to beef up the Explorer instead. Since I already have a huge thread on my previous work I decided to start fresh.

If you would like to see my previous mods, you can navigate from my signature link, or click here:
http://www.explorerforum.com/forums/showthread.php?p=523171#post523171

~

My plans are to install a D44 and 9-inch into the station wagon and run 35 inch tires. Hopefully she`ll still get in the garage, but if it don`t then oh well. During this I also have some body work to do.

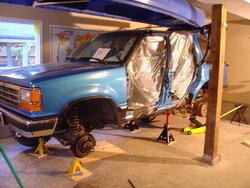
Right now I have the rear end out, I took off the spare tire hanger and removed the muffler and rear most heat shield. (doors are off for body work)Next the gas tank comes out so I can prep the underside for rust protection, from the t-case back. In the meantime I am trying to sell some parts for cash.

First big decision is what gear ratio. The 4.10`s on 33s was nice, but I think I`d like a bit more torque than that so I`m thinking 4.88 or 5.13s.
 

Attachments

  • prep.JPG
    prep.JPG
    62.9 KB · Views: 10,434


Join the Elite Explorers for $20 each year.
Elite Explorer members see no advertisements, no banner ads, no double underlined links,.
Add an avatar, upload photo attachments, and more!
.


Thanks guys, it`s nice to be able to take my time and think out everything during this, as well as clean it all up -and I won`t go out of my way to get in mud, but it`s hard around here.

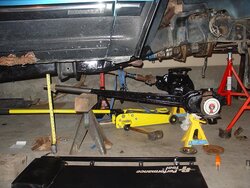
I get my c-wedge bushings tomorrow so I`ll be able to see if everything works out as planned tomorrow night, then if the angles are okay I can work on the radius arm brackets and of course finish the radius arms. The people who sell the RA extensions suggest some reinforcement, as in some flat bar welded on edge between the two halves, easy stuff.

How far forward are you moving the axle from stock? I moved mine about 2-3" forward to help with running the bigger tires.

I`m kind of letting the front driveshaft dictate where the axle will end up. right now I`m roughly set at 1.5 inches forward of bumpstop center, with the driveshaft slip joint about ( I figure) where it sat previously. My fenders are trimmed already, and already fit 33" easy. (my mod thread in my sig shows that process, if anyone needs to see)
Also, if I can butt my yet to be fabbed crossmember with radius mounts right up to my stock tranny mount, that may be the final decider. It`s close to being that way now. Gotta measure more but it would be cool if it worked out that way...


Join the Elite Explorers for $20 each year.
Elite Explorer members see no advertisements, no banner ads, no double underlined links,.
Add an avatar, upload photo attachments, and more!
.


Success

Picked up my 7* c-wedge bushings today and just as I calculated, everything is working out fine.
In the pic, my radius arm end is 4 inches from frame, my caster angle is 5* and I guess my pinion angle is fine, although researching d44 pinion angles on bronco websites just nets a ton of different opinions. Mine is -without measuring-, only a few degrees from matching the shaft angle.
 

Attachments

  • 7 degree bushings.JPG
    7 degree bushings.JPG
    76.3 KB · Views: 1,308


Looks good. You are right there are alot of varying opinions on caster settings for solid axles. 5* is a good middle of the road setting IMHO.


Thanks Fruity! (that`s what the F. Rizzo I know would say!) :D

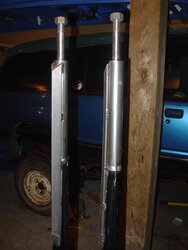
Welded up my radius arms today, well a friend welded them for me, since I`m not the greatest at that yet, but anyway..

The bent and twisted people I got the arms from suggested welding a piece of flat bar on edge on top of the arms to reinforce the structure. I opted for 1 inch angle iron, which is probably stronger, and looks better than flat anyway. Just painted `em up again and will mount them sometime this weekend.
 

Attachments

  • radius arms done.JPG
    radius arms done.JPG
    36.3 KB · Views: 1,278


Man great attention to your work. i like. i think my radius arms are longer than yours. i need to measure them tomm. Judgin by your pic in post 82 mine are a little longer. not sure keep up the great work.


Just measuring and planning..
Think I shortened my warrior shackles a bit too much, need a stock set if anyone here has some.. :rolleyes:


Still boring stuff going on. Got my 9 inch 5.13 gear set and Detroit locker, to be assembled next week.
I bought a set of bearings and seals for the 9 inch, to do myself, but the bearings look different, so I`m in limbo till I figure it out.


Still boring stuff going on. Got my 9 inch 5.13 gear set and Detroit locker, to be assembled next week.
I bought a set of bearings and seals for the 9 inch, to do myself, but the bearings look different, so I`m in limbo till I figure it out.
yeah arent there two 9" sizes? The "big bearing" and the "non-big bearing"?


Thanks Jefe,

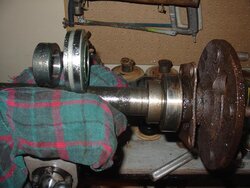
Yeah IZwack, there`s some differences in the old 9 inch axles, just not sure what difference I actually have here. I took a picture to bring to the parts store and see what they say.

-The bearings (ordered for 79 Bronco) are kind of stepped, and the old ones are not. And the other piece is a little bigger than my old one.

Anyway, here`s the pic:
 

Attachments

  • 9shaft bearings.JPG
    9shaft bearings.JPG
    58.5 KB · Views: 1,728


What are you going to do about you rlower spring seats being angled down a little


My 9" bearings look like the ones on the shaft, its from a 78 f-150. There are the big bearing and small bearings 9"s but there were also 2 or 3 different sizes of carrier bearings, 2.6 (I think) , 3.02 and maybe another?


Yomie, I`m gunna modify them with shims, my protractor shows they are about 8* out right now, shouldn`t be hard to do. One shim on either side to keep the bolt mounting surface flat perhaps?

Snoboarder, it`s possible I have f-150 axles then, I just hope the carrier bearings ARE the same, since all my parts for the gear and locker job are at the mechanic`s now, And they were ordered as bronco stuff. Boy that would be a bummer if they were the wrong size, I`ll have to look into that. Better talk to the mechanic too. I did measure the inner diameter of the bearings to see if they matched the locker and they did, if that means anything.

I bought a shop manual for F-150/bronco to 1979, but it doesn`t really solve anything, there is very little info about the bearings.

The book shows a collar, then bearing, then some kind of spacer, then a seal, then the mounting plate, in that order, from inside to outside. My shafts have no seal or spacer that I can see, but they did appear to have been leaking.
There is an inner seal just inside where the outer bearing/collar rests, but as of now I`m not sure how to get it out without taking more stuff out, actually I don`t know how to get that stuff out right now anyway. Want to get more info before I start trying to reef that stuff out with a seal pulling hammer.


Well $180 later, I now have my locker and 5.13 gears installed in the 9 inch 3rd member.
I stopped and seen a set of bearings for a 78 f-150 today, they are different, so I`m bamboozled as to what the proper bearings are. I do know that I have a 1/2 ton axle, and that a gear install kit for a 79 Bronco works.

Gotta get a bearing off a shaft and find a number on it, I can`t see one, but am being told there has to be, so we`ll see some time this weekend. In the mean time I am doing some bodywork, and hope to get the third member back in. It seems my driveshaft is too short now. with the mounting plate taken off the end of the axle, the u-joint will bolt up, but it`s 4 or 5 inches too short it seems.


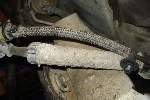
Well I been busy lately with bodywork, but I did nail down a set of bearings that work. Consensus is the 9 inch is somewhere between 73 and 79 model off of, most likely an F-150 in those years somewhere. Apparently the abundance of the axles and the fact I don`t know where they came from originally, makes it very hard to nail it down.

I cut the old bearings (they did not have numbers of any kind) and collars off with a cutting torch, if ya cut enough off it`ll slide of with a few hits of a hammer and chisel, otherwise it`s a close cut, and I didn`t want to burn the shafts.
The new bearings and collars I hammered on with a length of pipe and big hammer after having the bearings inside my house and the shafts kept outside in -10*C weather for a while.

Anyway, no pics needed, but the 9 inch is back together with new bearings, seals, brake assembly, locker, and 5.13 gear set.
Still gotta tie in the E-brake and deal with the driveshaft.

That "free" axle costed me around 1800 cdn dollars so far.


Body work is all done finally, now it`s all SAS.

Started building my radius arm/tranny mount bracket recently, and since I got no cash, I`m taking my time with the cheap stuff.
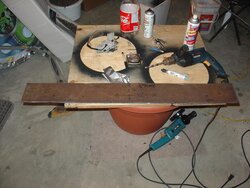
I started with some 1/4" plate steel, 42 inches long and 5 inches wide.
 

Attachments

  • radius arm bracket 1.JPG
    radius arm bracket 1.JPG
    53.8 KB · Views: 1,126


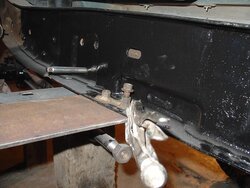
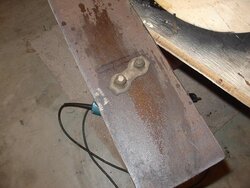
I centered it across the frame, resting up against the stock tranny mount, and I marked where to drill two holes per side using some leftover bolts and double nut doo-hickeys from stuff I removed from the truck previously. LOL I just can`t remember where they came from exactly, but whatever!

Once I had the locations marked in felt, I took the plate out from under the truck and drilled the holes, making sure they still lined up with my double-nut doo-hickeys.
the pics are from the passenger side, I staggered the bolt holes to miss some reinforcing metal inside the frame, not really neccessary to do that since it won`t be bolted there when the bracket is complete, but I wanted to bolt it tight while I bent the plate.
 

Attachments

  • radius arm bracket 1.5.JPG
    radius arm bracket 1.5.JPG
    55.8 KB · Views: 1,121
  • radius arm bracket 2.JPG
    radius arm bracket 2.JPG
    58.3 KB · Views: 1,115


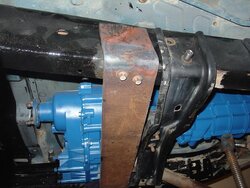
After I had the holes in the plate I butted it back up against the tranny mount and drilled the holes through the frame, using the plate holes as a guide, obviously.
Then I bolted it in place and heated up the bend area with an Oxy-Acetyline torch, then hit it with a really big hammer until it was bent. When it was close I squeezed it tight to the frame with a C-clamp and heated it again, leaving it to cool before removing the clamp. Afterwards, the bend was perfect.
 

Attachments

  • radius arm bracket 3.JPG
    radius arm bracket 3.JPG
    62.7 KB · Views: 1,127


Join the Elite Explorers for $20 each year.
Elite Explorer members see no advertisements, no banner ads, no double underlined links,.
Add an avatar, upload photo attachments, and more!
.


Then I took the bracket off for reinforcing. Also, instead of bolts in the place I drilled the holes, there will be pins, or steel dowels welded in place. These will serve to keep the bracket in place for bolt up and keep it from shifting. The bracket will be bolted higher up the frame. I can`t bolt it under there because of the final radius arm position.

~pics to follow


Back
Top